Slack Scope
UiPath.Slack.Activities.SlackScopeActivity
Overview
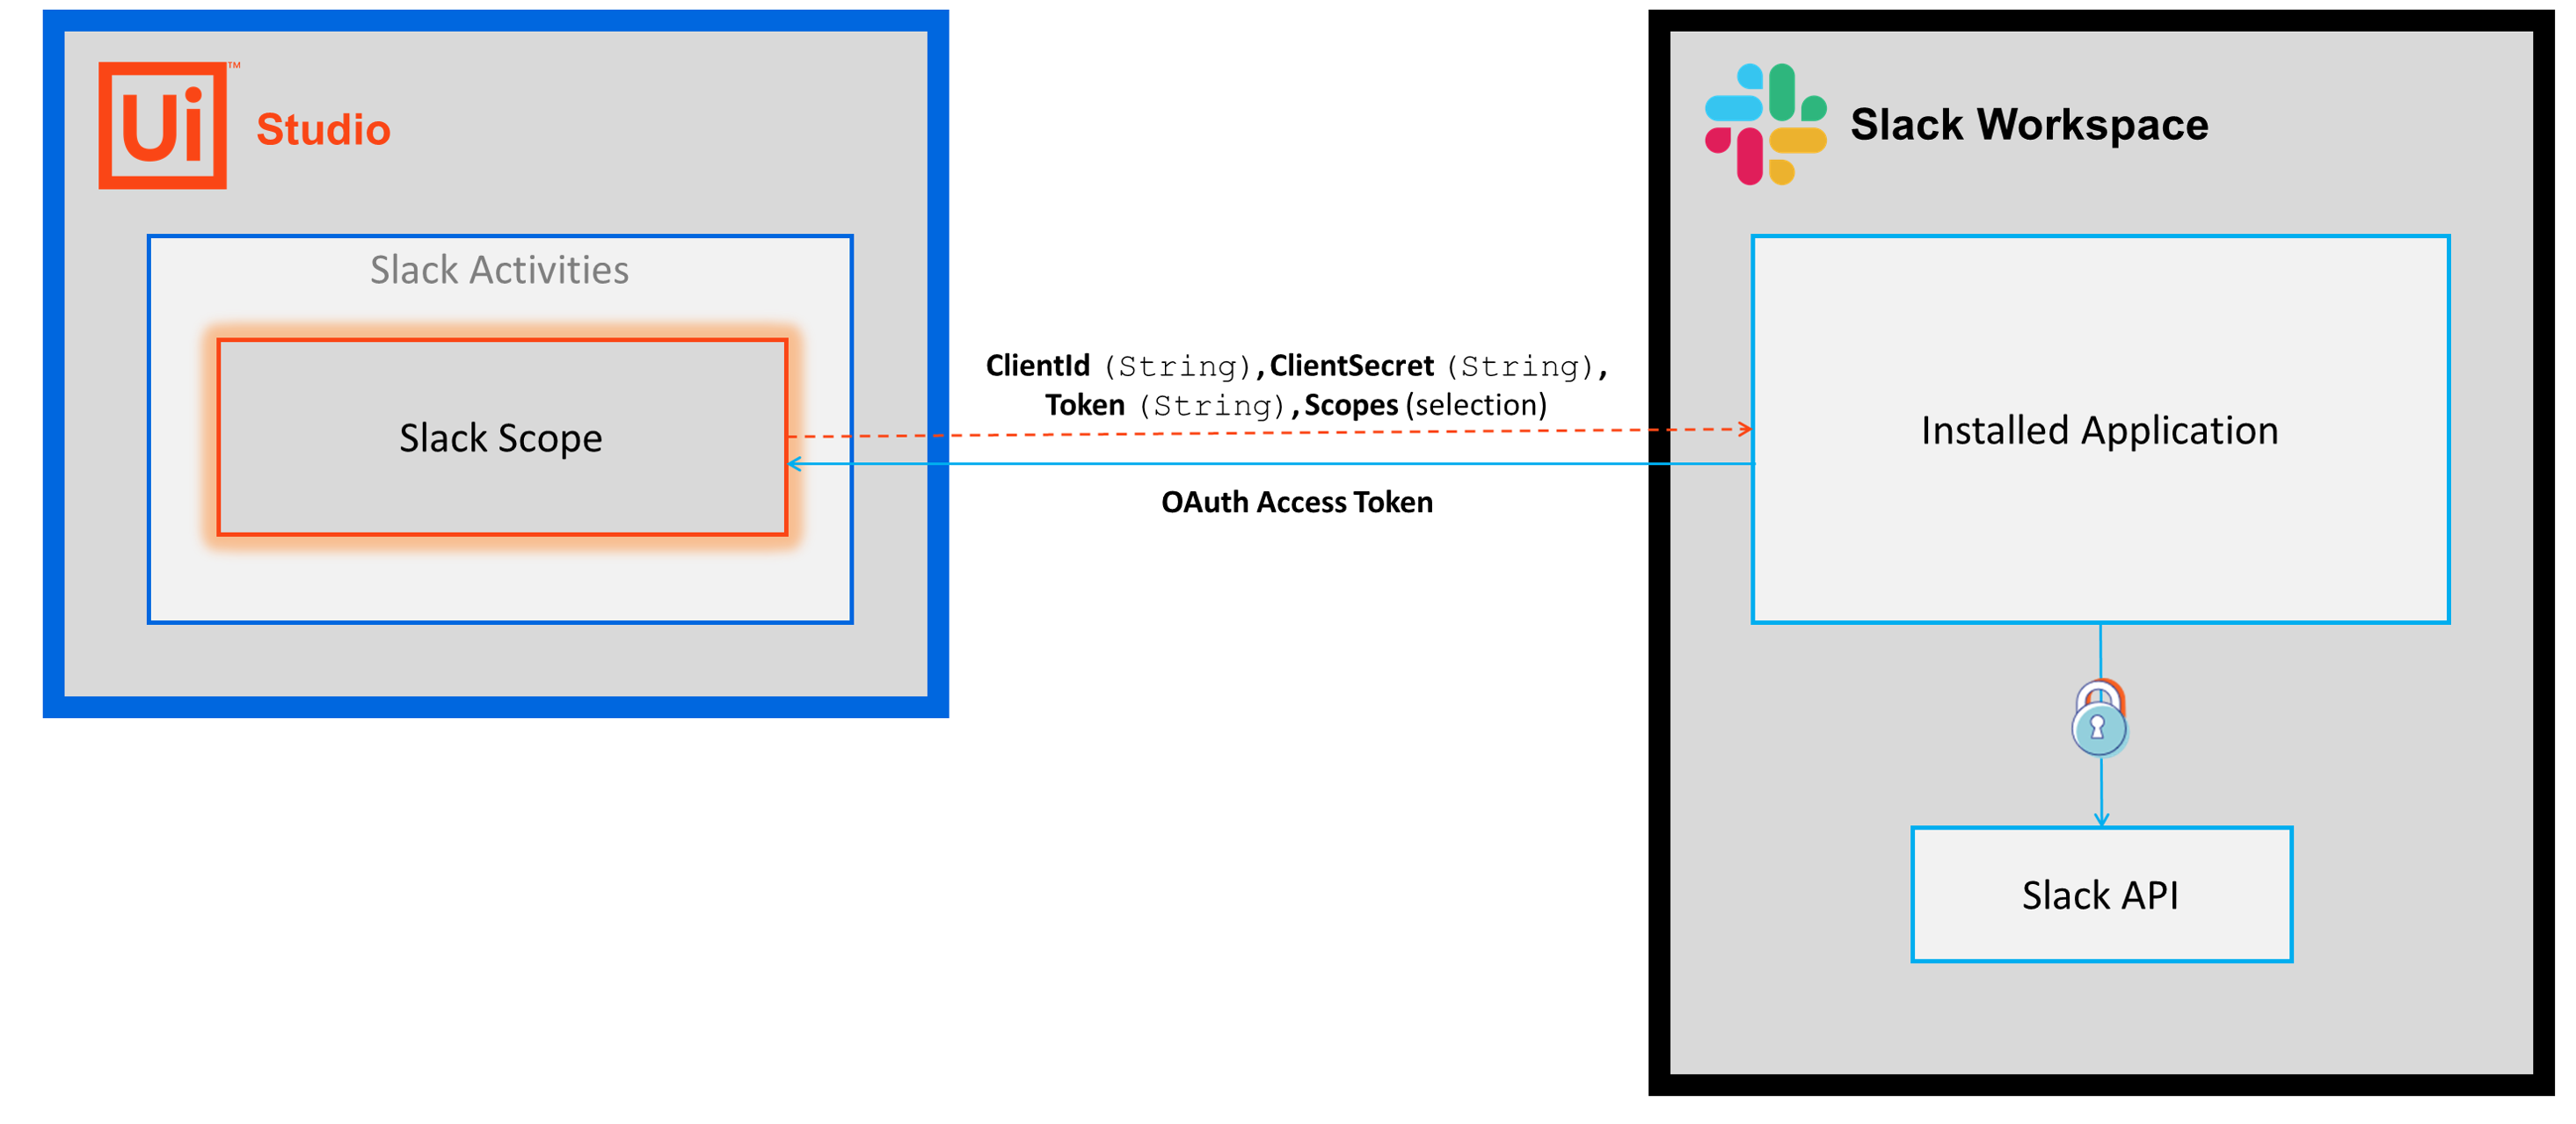
The SlackScope activity follows the OAuth 2.0 protocol to establish an authenticated connection between UiPath and the Slack API.
Before the Slack Scope activity can establish a connection, it needs authorization to take action on your behalf and access your permitted data. To grant authorization, you create and install a new Slack App to your workspace (no coding required). You don't need to publicly distribute this app via the Slack App Directory, you only need to install it to the workspace that you want to automate.
- For more information, see Single-workspace apps in the Distributing Slack apps documentation.
- For step-by-step instructions on how to create an app, see Create a Slack app in the Setup guide.
When creating the app, you assign the scopes (i.e., permissions) to define the API methods the app (and subsequently the activities) can call and the information it can access.
- For step-by-step instructions on how to add scopes, see Add app permissions in the Setup guide.
- For a complete list of the scopes required for this activity package, see Scopes to add in the Setup guide.
After registering the app, Slack assigns a unique Client ID (ClientID), Client Secret (ClientSecret), and OAuth Access Token (Token) that you enter in the Slack Scope activity to initiate a connection.
How it works
The following steps and message sequence diagram is an example of how the activity works from design time (i.e., the activity dependencies and input/output properties) to run time.
-
Complete the Setup steps.
-
Add the Slack Scope activity to your project.
-
Enter values for the Authentication (Attended), Authentication (Unattended) properties.
In the Body of the Activity
The Slack Scope activity has two different authentication models depending on the automation mode (unattended or attended).
There are two differences between unattended and attended automation as it pertains to Slack Scope activity: scope setting requirements and allowing access.
Scope setting requirements
As noted in the Add app permissions section of the Setup guide, if you plan to run unattended automation, you must set the scopes using the app's OAuth & Permissions feature settings.
If you want to run attended automation, you don't have to set the scopes using the app's OAuth & Permissions feature settings (you can), rather you set the scopes using the Scopes property (described below).
To enable the best user experience when using the activities, it's recommended that you set the using the app's OAuth & Permissions feature settings (as described in the Setup guide). By setting the scopes ahead a time, you can freely switch between unattended and attended automation when you're building and running your project.
Allowing access
When the Slack Scope activity runs during attended automation, a web page opens that prompts you to grant your app access to your selected scopes by clicking an Allow button.
During unattended automation, access is silently granted to your app in the background (no user action required).
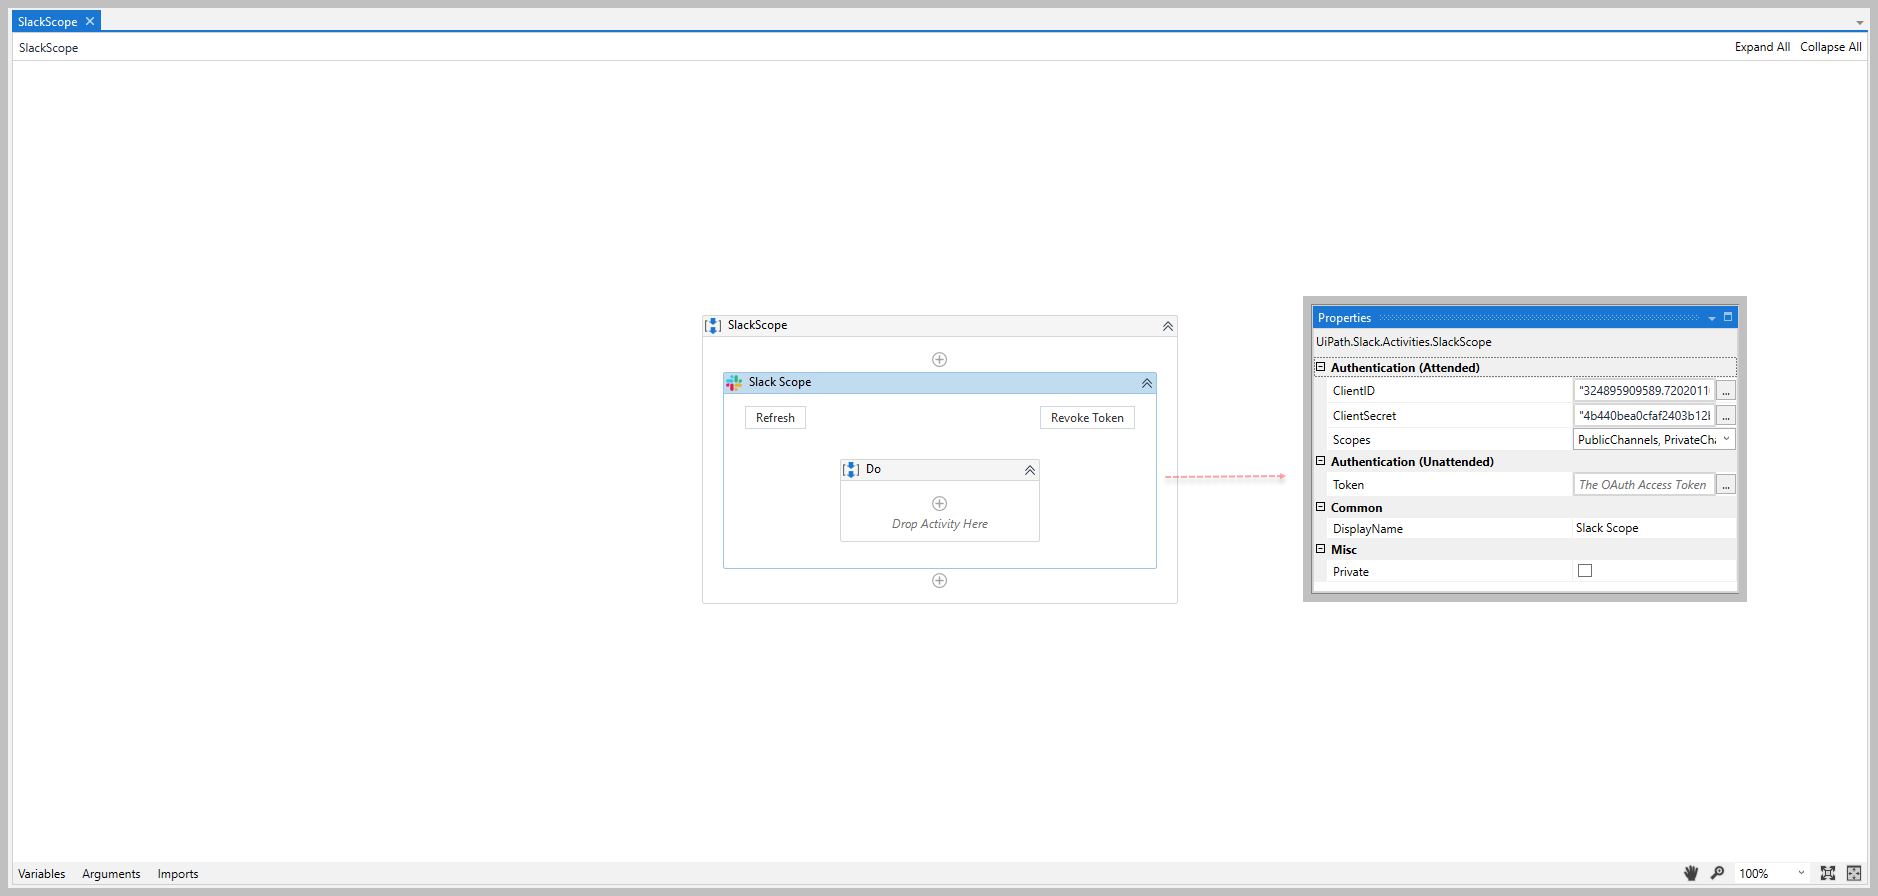
- ClientID - The unique ID assigned to your app by Slack. Enter a
Stringvalue.- This property only accepts the
Stringvalue of your Client ID. It does not supportStringvariables. - To find your Client ID, go to your created app's Basic Information page. Under App Credentials you'll see both your Client ID and Client Secret.
- This property only accepts the
- ClientSecret - The unique ID associated with your ClientID. Enter a
Stringvalue.- This property only accepts the
Stringvalue of your Client Secret. It does not supportStringvariables. - To find your Client Secret, go to your app's Basic Information page. Under App Credentials you'll see both your Client ID and Client Secret.
- This property only accepts the
- Token - The app's OAuth Access Token to use for unattended automation only. Slack automatically generates this token when you install the app to your workspace. Enter a
Stringvalue. This property only accepts theStringvalue of your OAuth Access Token. It does not supportStringvariables.- To get your OAuth Access Token, you must first install the app to your workspace. After installing your app, go to your app's Installed App Settings page (image shown above).
- For more information, see Install your app to your workspace in the setup guide.
Properties
Authentication
- Scopes - A categorized list of the scopes to grant (or previously granted when following the Setup guide) to the app. Select all the applicable scopes. There are 7 scopes: PublicChannels, PrivateChannels, DirectMessages, GroupMessages, Users, Chat, Files.
- For a complete list of scopes and their mapping to the activities and the allowed values above, see Scopes to add in the Setup guide.
Common
- DisplayName - The display name of the activity. This field supports only
StringsorStringvariables.
Misc
- Private - If selected, the values of variables and arguments are no longer logged at Verbose level.
- ReportApiErrorAsException - When selected, API error responses are reported in BusinessActivityExecutionException by all child activities that use this application scope. When cleared, the child activity populates the API error message in the ResponseStatus output property and workflow execution continues. Check the ResponseStatus property to confirm successful execution.
Output
- Connection - The connection which can be passed to a child application scope. This field supports only
Connectionvariables.
Example
The following image shows an example of the activity dependency relationship and input/output property values.
For step-by-step instructions and examples, see the Quickstart guides.