Building Your First Form Action
This is a step-by-step tutorial for building your first Form Action with the UiPath Form Designer. This tutorial demonstrates how to create three generic Form Actions, containing information relevant to an accounting department. For each company name stored inside a data table, a Form Action is created.
Tutorial
To build a generic Form Action:
-
Add a Build Data Table activity into your workflow.
- Click the DataTable... button and create a single column, of type
String, and rename it asClientName - Add as many rows as you want, containing names of companies. For this example, the following names were added as rows:
McUiPath Inc.,MFC, andDoogle. - Click the OK button.
- Inside the DataTable output property, press
CTRL + kon your keyboard and create aStringvariable, namedClientNamesDataTable.

- Click the DataTable... button and create a single column, of type
-
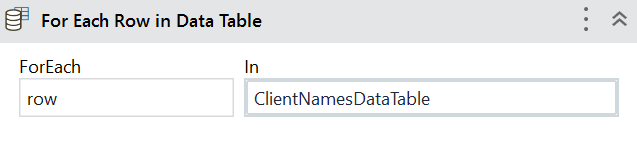
Add a For Each Row in Data Table activity into your workflow.
- Inside the ForEach field, type
rowinstead. The reason for this is that the wordrowis shorter and easier to use. - Inside the In field, pass the
DataTablevariable. For this example, passClientNamesDataTable.
- Inside the ForEach field, type
-
Add a Create Form Task activity inside the body of the For Each Row in Data Table activity.
-
Type a title for the Form Actions inside the TaskTitle property field. For this example, type in
"Accounting - fill in info about client". -
Type a priority that you want the Form Actions to have inside the TaskPriority property field. For this example, type in
TaskPriority.High. -
Open the FormData(Collection) window. Create an argument that passes the company names from the data table, to the form. For this example, create an argument with the following characteristics:
Name Direction Type Value ClientName In String row("ClientName").ToStringnoteThe
row("ClientName").ToStringexpression iterates through every row inside theClientNamecolumn, from theClientNamesDataTable. -
Deselect the GenerateInputFields checkbox, because this example involves manually adding form components.
-
-
Click the Open Form Designer button.
- Add a Content component to your form. Change the Field Key to the name of the argument that you've passed into the form. For this example, change the Field Key to
ClientName. This binds the data from each table row to the Content component. - Add a Text Field component to your form. For this example, inside the Label field, type
Industry. - Add a Number component to your form. For this example, inside the Label field, type
Revenue. - Add a Radio component to your form. For this example, inside the Label field, type
Rate the financial performance in the previous year. Inside the Description field, type inWhere 1 equals "Modest" and 4 equals "Great".Inside the Data tab, add the following labels in the Values section:1 - Modest2 - Moderate3 - Substantial4 - Great.
- Add a Content component to your form. Change the Field Key to the name of the argument that you've passed into the form. For this example, change the Field Key to
-
Add a Number component to your form. For this example, inside the Label field, type
Long-term debt. -
Save the form.
Result
The result of this tutorial is three new Form Actions that appear in the Inbox tab, as Unassigned Actions.

Preview your first Form Action
To preview your form, click the Preview ![]() icon, in the Form Designer ribbon.
icon, in the Form Designer ribbon.

Sample workflow
To check the complete workflow or to have a future reference, download the XAML example