Using the Webhook connector
Using the HTTP Webhook connector from Studio
-
Select the HTTP Webhook trigger
In Studio, select the HTTP Webhook trigger.
-
Create or select a connection
Use an existing connection or create a new one. Learn how to create connections.
-
Copy the webhook URL
Retrieve the generated webhook URL from the trigger activity.
-
Configure your data filter
Define the conditions under which the webhook event should trigger.
-
Publish your process
Publish the workflow so it is available to be triggered.
-
Register the webhook URL in your application
Paste the copied webhook URL from step 3 into your vendor application's webhook configuration.
Using the HTTP Webhook connector from Orchestrator
-
In Orchestrator, select Open Event Triggers > Add a new trigger.
-
Select your process, provide a name, and click Next.
-
Select Connector: HTTP Webhook.
-
Create or select a connection.
Use an existing connection or create a new one. Learn how to create connections.
-
Configure your data filter.
Define the conditions under which the webhook event should trigger. Learn how to configure data filters.
-
Copy the webhook URL for later use.
-
Add the trigger to complete setup.
-
In your workflow, use the Get Trigger Event Output activity to utilize the webhook’s header or body.
Pass
UiPathEventObjectId(data type=Text) as the input argument for the required property UiPath event object ID.
Configuring data filters
Data filters can be applied to both the body and the header of the provider’s response.
Let's assume the provider returns a body response as follows:
{
  "id": "exampleCartId",
  "token": "exampleCartId",
  "email":"example@email.com"
  }
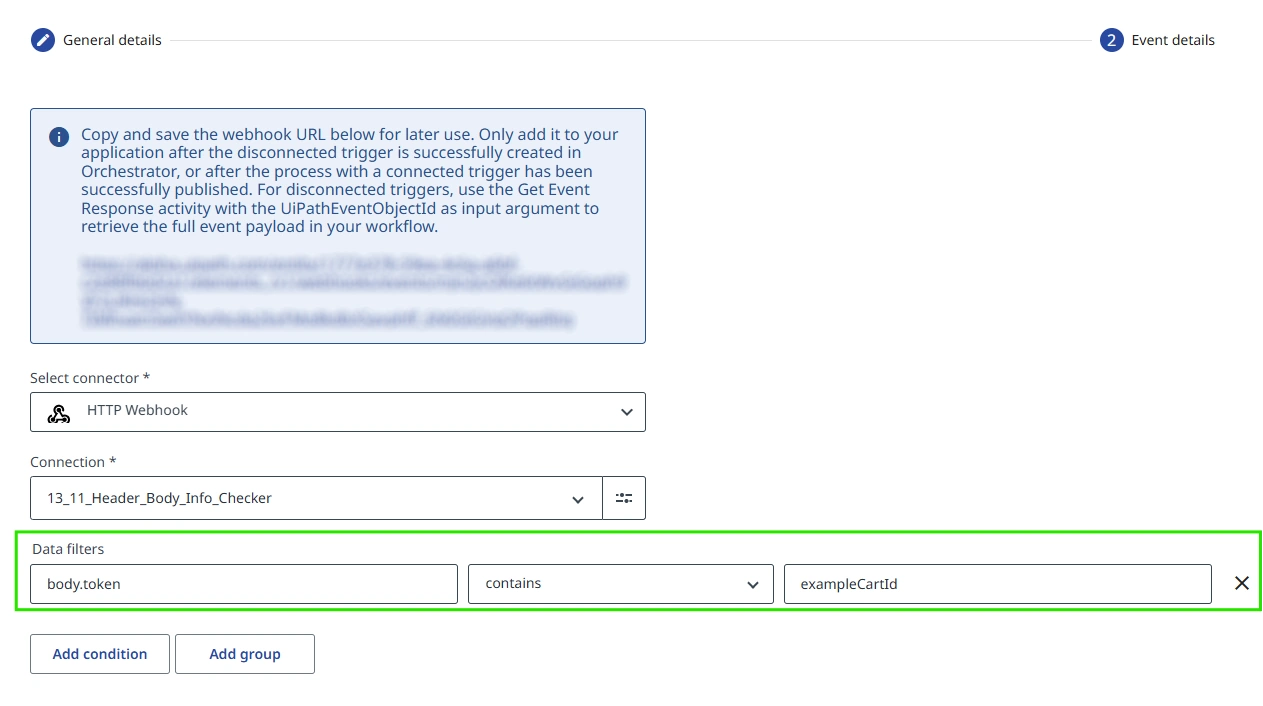
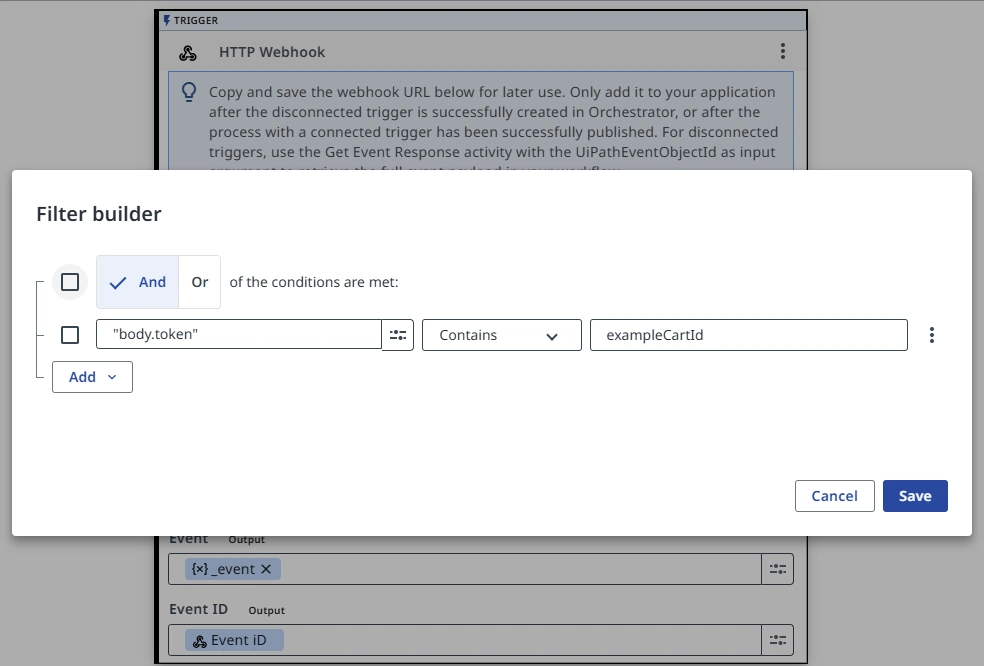
Orchestrator event triggers
If you want your process to trigger when the token contains exampleCartId, here’s how you can set it up:
When a JSON property includes a hyphen (-), it must be enclosed in double quotes.
For example: header."x-shopify-shop-domain" contains ecommerce.
Studio event triggers
To accomplish the same behavior using the HTTP Webhook trigger activity in Studio, configure the filter as follows:
Publishing
Publish your workflow starting
from an HTTP Webhook event to activate the public
facing URL. You can then test this by triggering
events in the vendor application or send a direct
curl command to the
URL:
Automation Cloud:
curl -X POST https://cloud.uipath.com/{webhook_url} -d "example
            curl call"
Automation Cloud Public Sector:
curl -X POST https://govcloud.uipath.us/{webhook_url} -d "example
            curl call"
When Integration Service accepts the event, it responds back with the following JSON payload:
{ "webhookEventId": "wr-4ad55717e1.a7bbf1e8-72a1-4371-82d2-d{example}", "correlationId": "384d496c-2f6d-{example}" }
This payload is useful for testing, but not necessary anywhere within your workflow.