How to create activities

Intro
Activities are the building blocks of process automation. Each contains an atomic action which, stacked together with other activities, composes a workflow.
UiPath Studio includes a number of premade activities that you can install through the Package Manager.
The steps below will give you the foundation to build custom activities in 5 minutes flat. In this section, we'll create an activity package and in the next, populate it with functional activities.
What you'll need
- Visual Studio Community/Professional/Enterprise (2019 required)
- UiPath Studio
Steps
- Add the UiPath Activity Creator Extension to Visual Studio
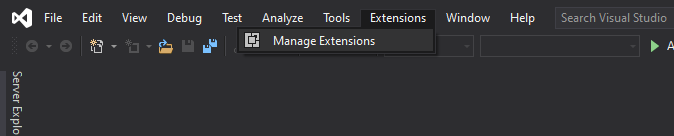
Open Visual Studio and click Extensions > Manage Extensions.
In the wizard that appears, click Online and then Search (Ctrl+E) for UiPath. Download the UiPath Activity Creator extension.
Close Visual Studio and, once the VSIX Installer appears, complete the installation.
- Create a UiPath Project
Reopen Visual Studio and double-click Create a new project on the home screen.

On the Create a new project screen, type "uipath" in the search bar, select UiPath Standard Activity Project, and click Next.

Give your project a name. The UiPath convention is <Your company's name>.<Your product's name> (e.g. UiPath.Orchestrator). Then click Create.

Navigate to the Solution Explorer and notice that 3 projects, a Shared folder, and many files have now been added to solution. This is the foundation of every activity package. Continue to the next section to add your first activity.
