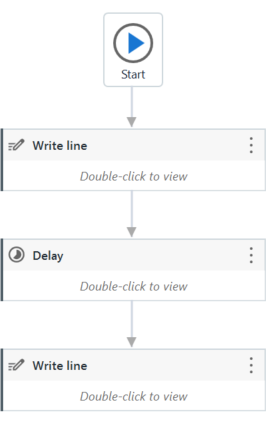
Example of Using the Delay Activity
To exemplify how you can best use the Delay activity, let's create an automation that writes two messages to the Output panel, with a delay of 20 seconds between them.
-
Create a new flowchart.
-
Add a Write Line activity and connect it to the Start node.
-
Double-click the activity, and in the Text field, type "This is the start time."
-
Add a Delay activity and connect it to the previously added activity.
-
Double-click the activity, and in the Duration field, enter 20 seconds (00h 00m 20.000s). This is the 20 seconds delay between the two logged messages.
-
Add another Write Line activity and connect it to the previously added activity.
-
In the Text field, type "Message delayed by 20 seconds.".
The final project should look as in the following screenshot.
-
Press F5. The automation is executed. Note that, in the Output panel, the two messages added in the Write Line activities are written twenty seconds apart.
