Studio IDE
The Studio IDE interface consists of a dedicated code editor, file tabs, and breadcrumbs for easy navigation. This layout enables you to manage your files, explore project structures, edit your code, version projects, run, and publish your automations.
Code Editor
The code editor displays your current automation project, enables you to make changes to it, and provides highlighting for errors found inside your code. You can use the Code Editor like you would use any other code editor tool.
The Context Menu - when you right-click a line in your coded automation, the Context Menu appears. You can also perform the actions inside the Context Menu using keyboard shortcuts.
| Option | Keyboard shortcut | Description |
|---|---|---|
| Quick Actions | Ctrl + . |
Refactor, generate, or modify code elements with an action displayed automatically. An example of a quick action can be Introduce parameter for X → into new overload . |
| Rename | F2 |
Rename the code element that you have selected. The change applies to all references of the element inside the entire project. |
| Go to Definition | F12 |
Navigate to the source of a type or member, and displays the result in a new file tab. |
| Go to Implementation | Ctrl + F12 |
Navigate to the implementation of a symbol:
|
| Go to Line | Ctrl + G |
Enter the number of the line you want to move the cursor to. |
| Toggle Breakpoint | F9 |
Set a breakpoint on the line you have selected. The breakpoint appears as a red dot on the left side of the Code designer panel. |
| Find All References | Shift + F12 |
Find where a particular code element is referenced throughout the opened file. |
| Format Document | Ctrl + K, Ctrl + D |
Set the appropriate indentation, spacing and wrapping. |
| Show Documentation | F1 |
Go to the corresponding documentation of the feature or coded automation API. |
| Comment | Ctrl + K, Ctrl + C |
Comment out the line you have selected. |
| Uncomment | Ctrl + K, Ctrl + U |
Uncomment the line you have selected. |
| Cut | Ctrl + X |
Cut the line you have selected. |
| Copy | Ctrl + C |
Copy the line you have selected. |
| Paste | Ctrl + v |
Paste. |
| Delete | Delete |
Delete the line you have selected. |
| Select All | Ctrl + A |
Select all lines in the file. |
For keyboard shortcuts that you generally use in Studio, not specifically for coded automations, visit Keyboard Shortcuts
Keyboard shortcuts
You can expand or reduce your current code selection, using the following keyboard shortcuts:
Ctrl + Shift + Num+: Expand the current code selection to the next larger syntax node, such as block, method, class, namespace, or entire file.Ctrl + Shift + Num-: Reduce the current code selection to the next smaller syntax node.
Code Editor Settings
When you work with coded automations, you create and edit them in the dedicated code editor. To personalize the built-in Studio code editor, navigate to Settings, and select Code Editor.
The Code Editor settings apply only to coded automations.

The table below describes each code editor setting.
| Setting | Description |
|---|---|
| Font | Choose the font of the code. |
| Font Size | Set the size of the font. |
| Tab Size | Set the size of the tab. |
| View Whitespace | Highlight the spaces created when you press Space on your keyboard. |
| Highlight Current Line | Highlight the line where you have your cursor on. |
| Show Structure Guide Lines | Enables dotted structure guide lines on your code, to identify individual blocks. |
| Show Error Squiggles | Show a red squiggle that indicates a compiler error or warning. |
| Show Line Numbers | Show the number of each line on the code that you're working on. |
| Auto Convert Tabs to Spaces | Create 4 spaces when using the Tab key. |
| Show Selection Margin | Show a margin next to the line of code that you're editing. |
| Show Selection Matches | Find and highlight all the matching strings for the range of characters you selected. |
| Highlight References | Highlight references to the object your cursor is on. Only objects that match the current context are highlighed. |
| Enable Source Decompilation | Decompile source code when you view the definition of an object using Go to Definition. Enable this to navigate to the definitions available in the CodedWorkflowBase class. Visit Base class for more information. |
| Enable Import Completion | Automatically import the namespace that includes the selected symbol, with IntelliSense. |
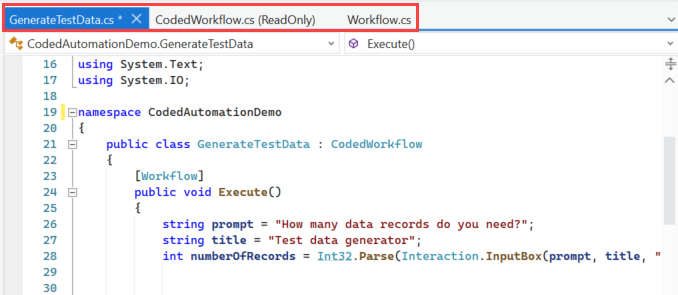
Tabs
The code editor opens files inside your project with tabs, in the editor's header.
When you open a file, a new tab is displayed for it.
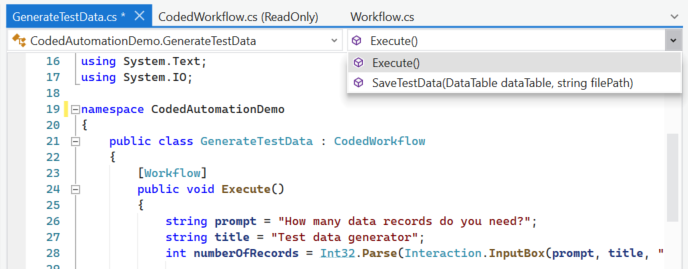
Breadcrumbs
In the code editor header, you can navigate through classes and methods inside a file, using breadcrumbs.
Versioning
You can version Coded Automation projects like any other project in Studio. You can version projects when you publish them to Orchestrator, or if you use source control systems, such as GIT or SVN.
- Publish versioning - Projects in Studio can be versioned using either the semantic or legacy versioning scheme. The semantic versioning scheme has the format Major.Minor.Patch[-Suffix] and the legacy versioning scheme has the format
M.m.bbbb.rrrrr. The project's semantic version can be modified from theproject.jsonfile or the Publish window. The suggested version number in the Publish window is generated based on the project's previous versioning scheme. Visit Setting the Project Version to learn how to version your projects in Studio. - Source control versioning - You can version your coded automations projects using source control systems such as GIT, TFS, or SVN. Visit About Version Control to learn how to version your projects using source control systems.
Find and Replace
To open the Find and Replace dialog, use the keyboard shortcuts below:
Ctrl + Shift + F- opens the Find and Replace dialog in the Find In Files tab.Ctrl + Shift + H- opens the Find and Replace dialog on the Replace in Files tab.
Find in Files
-
Type the characters you want to search in the Search bar.
-
Select one of the search options in the Search bar:
- Match case
- Match whole word
- Regular Expression
-
From the Project dropdown select the place where to search for the characters:
- Project - search in current project.
- Opened Documents - search in the opened documents.
- Documents - search in all documents inside the project.
-
Click Open in Find Panel to open the search results in Studio.
-
Click Find Previous to find the previous result and Find Next to find the next result.

Replace in Files
- Type the characters you want to replace in the Search bar.
- Type the characters that you want to replace with in the Replace bar.
- Select one of the search options in the Search bar:
- Match case
- Match whole word
- Regular Expression
- From the Project dropdown select the place where to search for the characters:
- Project - search in current project.
- Opened Documents - search in the opened documents.
- Documents - search in all documents inside the project.
- Click Open in Find Panel to open the search results in Studio.
- Click Replace Next to replace the next iteration or Replace All to replace all iterations.