Managing Namespaces
Importing New Namespaces
From the Data Manager
- Open the Data Manager.
- Navigate to the Namespaces panel.
- Select Add namespace. A dialog listing available namespaces is displayed.
- Use the search box at the top of the dialog to filter through the list. Suggestions are provided while you type, in case you are not exactly sure what you are looking for.
- Select the namespace to import it.
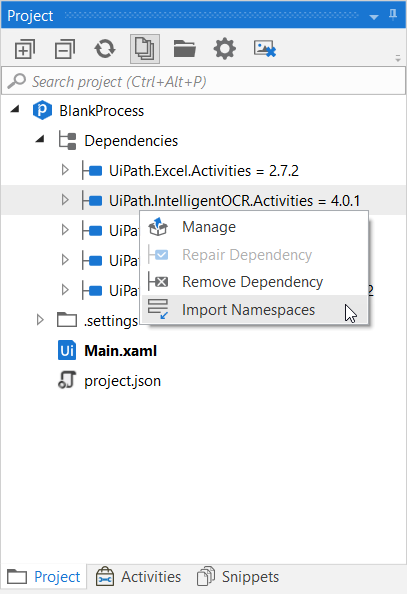
From the Project Panel
Whenever you add a web service to a library project or install a new dependency to your project, either a .nupkg file from Manage Packages default feeds or a custom library that you've created, the namespace can be imported from the Project panel as well.
Simply right-click the dependency or web service in the tree, and select Import Namespaces. The namespaces are automatically added to your project, you can check them in the Imports panel.
Removing Namespaces
To remove a namespace, open the Data Manager, navigate to the Namespaces panel, then right-click the namespace and select Delete.
To remove all the namespaces that are not used anywhere in the current file, select Remove Unused > Imports in the Studio ribbon.
Note that namespaces can only be removed if they aren't used. For example, you can remove a namespace from the project if the assembly that contains it is no longer referenced by the project.